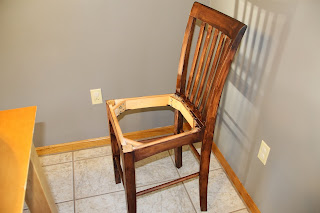
We purchased the exact same stain from amazon that was used in the blog (General Finishes Java Gel Stain) and it worked very well--it's not the same as a thin regular stain; it's a gel, which seems to make it work better for this project because it goes on thicker. We began our project by taking all of the seat cushions off of our chairs. Once we did that, we lightly sanded them--you really only need to rough them up; they don't have to be sanded down completely.
If this is a project you are going to do, just know that it takes time! There are three coats of stain, LOTS of drying time (close to a week) and then the polyurethane and more drying time. I guess I didn't read how much drying time was required initially, but it worked out and was definitely worth the wait!
Apparently I am not the best reader because I also missed that you DO NOT wipe off the stain. My husband and I were staining away and he's wiping so I am wiping because that's what you do with stain typically. I went to the blog and realized that we needed to pretty much paint the gel on. Here is what our chairs looked like after the first coat (I know...it doesn't look like much, but it gets better):
This coat dried for 12 hours and we applied the second coat. Here are pictures after the 2nd coat:
The chairs definitely look better on coat two, but you can still see the light wood popping through so it definitely needed a third coat. We let the 2nd coat dry for 24 hours and then did a third coat. Here is what it looked like after the last coat of stain:
I just put the fabric face-down on my table and cut out the pattern of the cushion with about 3 inches around each side and cut it out:
After that, I just wrapped the fabric around it and stapled it with a heavy-duty staple gun. Then I put the cushions back onto the chair. It was actually pretty easy! Here is the finished product:
We did all of our chairs one weekend and spent the following weekend staining the table. I will say that when my husband sanded the table, he didn't just rough it up, he completely sanded the top. Here are some pictures:
Although this project took a couple of weekends for us to complete, I am so happy that we did it! My table looks great and it was way cheaper to re-do it than to get something new. We spent under $100 for this project--and we have plenty of leftover stain and poly to complete other projects. Here is what the table looks like in my dining room:
This was a big project to tackle, but you can definitely start small--try a shelf or something if you are afraid to do something big. In my case, our table was old and scratched up so I didn't think I could really ruin it. It was a great experience and definitely gave me the confidence to do other projects. We did end up doing our small half bath and this summer we'll do our other bathroom vanity. Good luck!


No comments:
Post a Comment